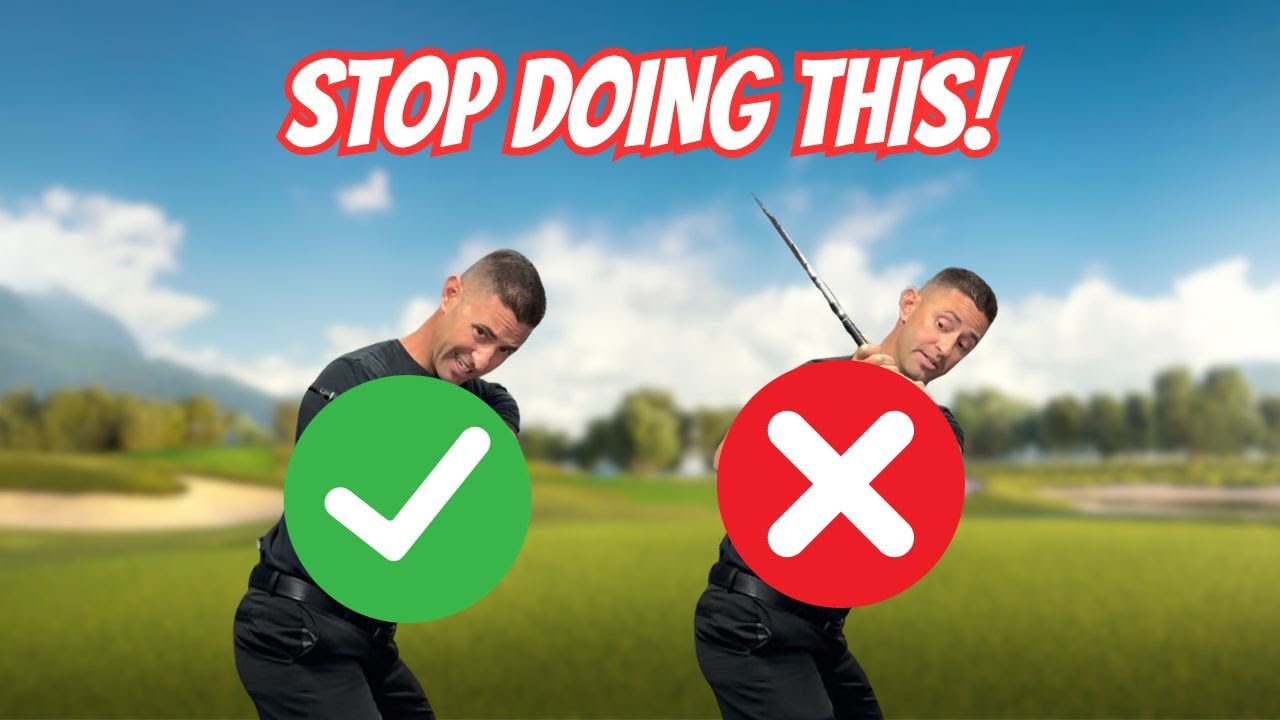
One elbow. One small movement. One enormous chain reaction that runs through the entire backswing and destroys the downswing before it ever begins.
The chicken wing trail elbow is one of the most overlooked swing killers in amateur golf. Not because golfers do not know it exists, but because most do not understand what it actually prevents. It is not just an aesthetic problem or a technical flaw. It is a biomechanical block that stops rotation, collapses spine angle, and forces the downswing into the one path guaranteed to produce the worst possible results.
At Berman Golf, fixing the chicken wing is one of the fastest ways to unlock more shoulder turn, maintain better spine angle, and eliminate the over the top cast that is behind so many slices and weak contact patterns.
What Actually Happens When the Trail Elbow Flares
Here is the biomechanical chain that gets triggered the moment the trail elbow flares out during the backswing.
When the elbow flares away from the body, the shoulder externally rotates. That external rotation limits how far the thoracic spine can continue rotating. The body hits a wall. Rotation stops.
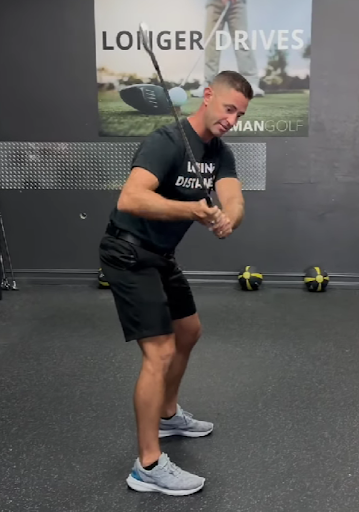
But the brain still wants to get the club farther back. So it borrows from somewhere else. The spine bends sideways. The body sways off the ball. The head moves. Spine angle is lost.
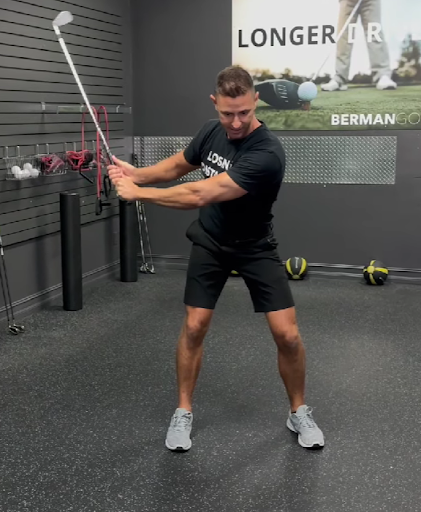
That borrowed backswing has no real power in it. The muscles that should be loaded, the core, the glutes, the trail leg, never get the signal to fire because the rotation was blocked before they could be recruited. The backswing looks complete but the body is not loaded.
And then on the downswing, a flared trail elbow has only one path available. Casting. The elbow comes out and forward, the club comes over the top, and the result is steep, outside in contact with all of the problems that come with it. Slice. Weak contact. Thin shots. The whole collection.
What Keeping the Trail Elbow Tucked Actually Does
Here is the contrast that makes the fix immediately obvious once it is felt.
When the trail elbow stays close to the body during the backswing, the shoulder stays in a position that allows continued thoracic rotation. The rotation can keep going. The body can keep turning. The spine angle can be maintained because there is no lateral compensation needed to find more range.
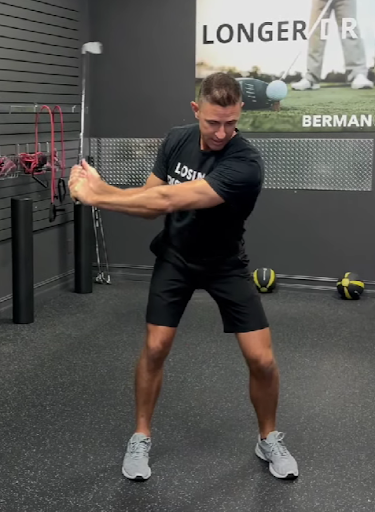
The back gets to the target. The core loads. The hip loads. Real shoulder turn happens from real body rotation instead of arm movement and compensation.
And on the downswing, a tucked trail elbow naturally drops into the slot. The club approaches from the inside. The belt buckle can initiate the downswing correctly because the body is in a position where it can actually lead.
The Drill, Tuck and Rotate
Here is the drill that builds the tucked trail elbow into the backswing through deliberate repetition.
Get to the top of the backswing in whatever current position feels natural. Chicken wing and all. Feel where the elbow is.
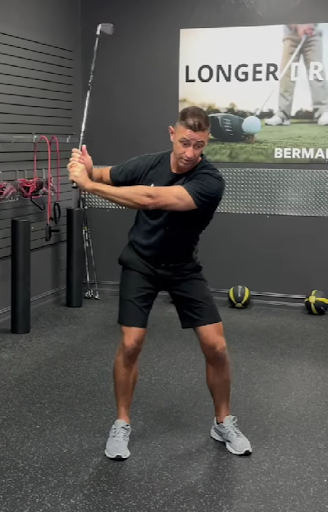
Now push the lead knuckles away from the target, then tuck the trail elbow down. Not forced inward awkwardly. Just dropped down and back toward the body from wherever it was flaring out to.
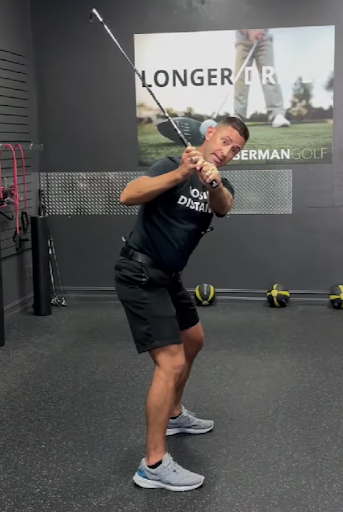
Hold that tucked position tight. Then from there, try to rotate a little bit farther.
Here is how to know if it worked correctly. The core should feel tight. The stomach muscles on the right side should be at their limit. The trail hip should feel loaded. If instead the body just moves upward or the head rises, the rotation went up instead of around and the spine angle was lost again.
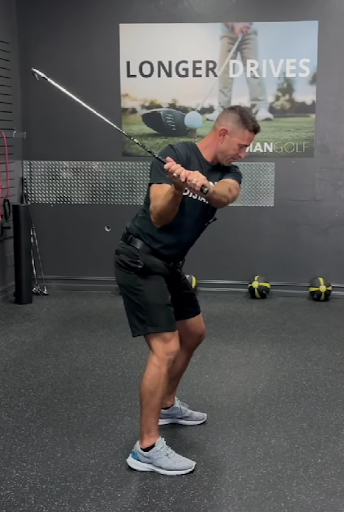
elbow being tucked allowed real rotation to happen instead of borrowing from the spine angle to extend the backswing artificially.
How the Tucked Elbow Changes the Downswing
Here is the payoff that makes fixing the chicken wing worth the time it takes to retrain.
When the trail elbow is tucked at the top of the backswing, initiating the downswing with the belt buckle becomes natural instead of forced. The body is loaded. The elbow is in a position that allows it to drop into the slot as the lower body begins its move toward the target.
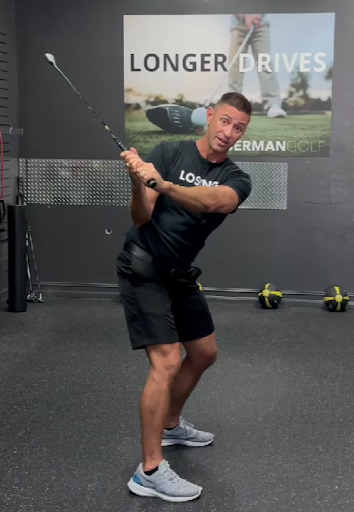
Compare that to what happens with the chicken wing. When the elbow is flared at the top, the only available downswing path is to cast it. The elbow comes out and forward. The club follows it over the top. The belt buckle cannot lead because the arm is already in the way.
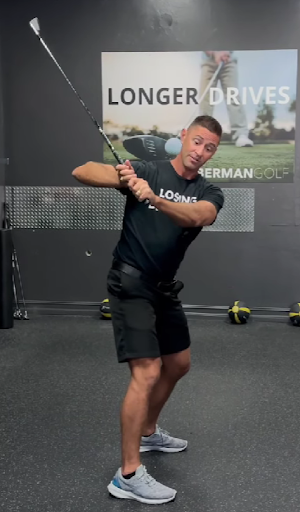
Tuck the elbow. Initiate with the belt buckle. Come through it. That three part sequence is the entire correction.
Making It Automatic
Here is the practice approach that makes the tucked trail elbow a default instead of something that has to be consciously remembered on every swing.
Go to the top of the backswing with the chicken wing present. Then deliberately tuck the elbow. Feel the difference in rotation available. Feel the core tighten. Feel the hip load. Hold for a few seconds.
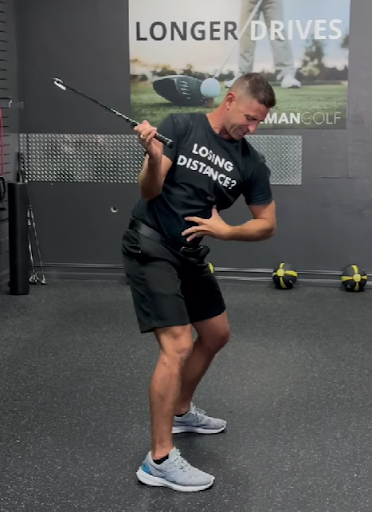
Do that repeatedly until the tucked position starts to feel more natural than the flared one. The brain needs repetitions of the correct position to start preferring it over the pattern it has been running.
As the tucked position becomes more natural, start initiating backswings with the elbow already staying close to the body instead of arriving there through a mid backswing correction. The goal is a tucked trail elbow from the first move, not a correction applied at the top.
Get a Free Swing Analysis
Want to know whether the trail elbow is flaring and blocking rotation in the backswing right now?
Set the camera or phone up at two angles. One from the front, face on. One from behind, down the line. Film in slow motion. Swing.
Send both videos to gaindistance.com and Dr. Berman will give a free swing analysis. The first one is on him.
See exactly what the camera shows, not what the brain thinks is happening. The trail elbow position at the top of the backswing is one of the clearest things visible in slow motion and one of the most commonly missed from the inside.
Want a Step-by-Step Blueprint?
If this resonates and the advice out there feels designed for 25-year-old tour pros, there is a simple blueprint built specifically for senior golfers.
It breaks down:
How the aging body changes Which muscles actually produce power How to gain distance without swinging harder How to improve consistency while reducing aches and pains
It is written at a fifth-grade reading level with clear visuals and practical drills that can start immediately.
A FREE digital copy is available at: 👉 gaindistance.com
No gimmicks. Just clarity on how the body should move to play better golf for years to come.
Bringing It All Together
One flaring trail elbow blocks rotation, forces swaying, loses spine angle, and makes the over the top cast the only available downswing path. One tucked trail elbow allows continued rotation, maintains spine angle, loads the core and hip properly, and puts the belt buckle in a position where it can actually lead the downswing.
Go to the top. Push the lead knuckles away from the target. Tuck the trail elbow down. Hold it tight. Rotate a little farther until the core limits the movement and the hip feels loaded. Then reverse it. Belt buckle leads the downswing. Come through it.
At Berman Golf, the focus is biomechanics first. Not cookie cutter swings. The goal is teaching the body how it should move, especially as it ages, so power can be generated safely and repeated under pressure.
The in-house and online coaching programs are built specifically for senior golfers who want more distance and better consistency without beating up their bodies.
For anyone tired of advice designed for tour pros and ready for a blueprint built for their body, help is available.
Because when the trail elbow stays tucked and the rotation is real, the over the top cast disappears and the belt buckle finally gets to lead the downswing the way it was always supposed to.
And when the belt buckle leads, the game gets soooooo much easier!
If you enjoyed what you read and want to see it in action, watch the video below where Dr. Berman demonstrates the chicken wing fix and the tuck and rotate drill!