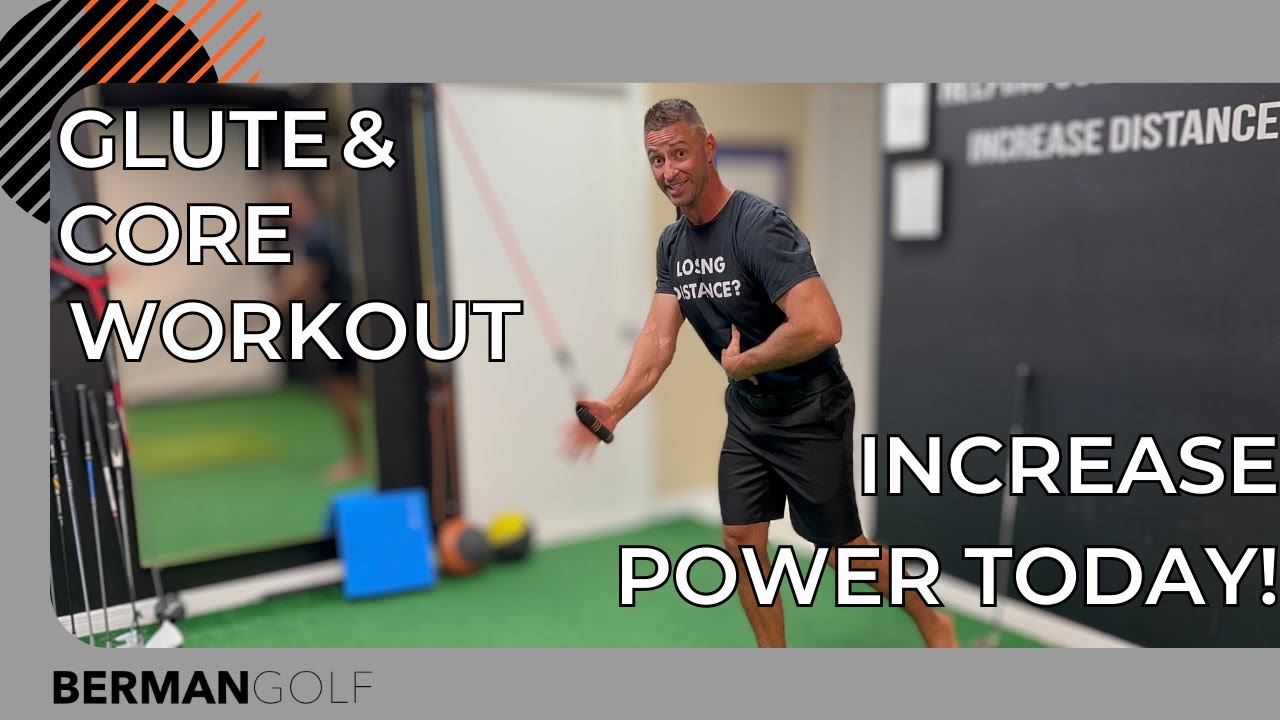
This is not a golf drill. It is a strength and endurance builder that directly transfers to the golf swing.
The distinction matters. Most golf drills train the pattern of the swing. This one trains the muscles that power it. And for senior golfers who feel like they are doing everything right technically but still cannot generate the power they used to, this is almost always where the gap lives.
The glutes and core are there. The strength and endurance to sustain them through a full round of golf is not. This three stage progression builds both, barefoot, with a resistance band, in the address position.
At Berman Golf, this is one of the highest return exercises available for senior golfers. Simple to set up. Physically demanding when done correctly. And the results in ball striking and distance show up faster than almost anything else.
Stage 1, Single Leg Hold at Address
Here is the starting position and the only piece of equipment needed for stage one.
Stand in golf address position with the feet close together. Core engaged, belly button pulled in, still breathing. Then start increasing pressure through the trail foot.
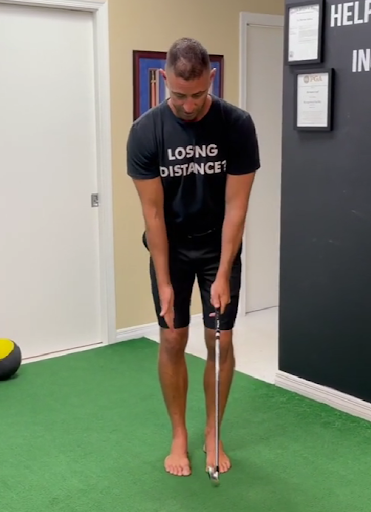
Slowly pick up the lead foot and reach the lead big toe backward so just the tip of it is barely touching the ground. Not resting on it. Barely touching it.
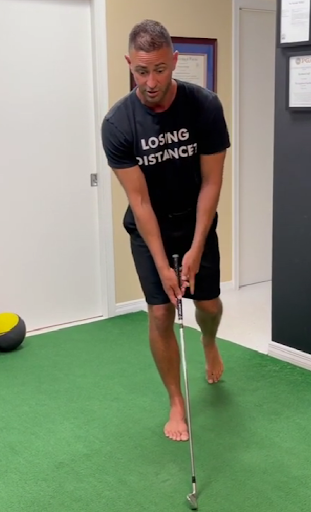
Hold it there. Barefoot. Do not do this with shoes on. The foot muscles need to feel the ground directly to contribute to the chain that runs up through the glute.
Here is what should be happening within thirty seconds. The trail foot muscles should be working hard. The trail glute should be firing. The core should be engaged throughout.
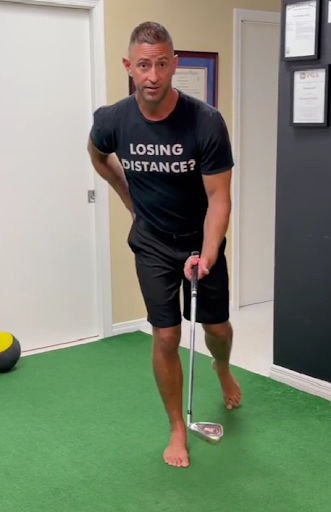
If the glute is not on fire after a minute, something is off. The most common mistake is shifting too much weight or cheating with the lead big toe. Keep it static. Keep it isolated. The trail leg does all the work.
The goal is a two minute hold. Not thirty seconds. Two full minutes of sustained glute and core activation in the address position.
Stage 2, Add the Resistance Band
Once the two minute static hold is achievable, the resistance band comes in to add the core extension component.
Attach a band to something above chest height. Hold it with both hands close to the chest.
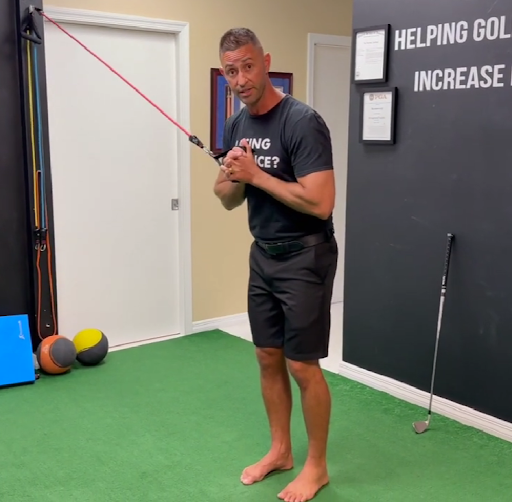
Get back into the same single leg position. Feet together. Core engaged. Trail foot pressing. Lead big toe barely touching behind. Once stable, slowly push the hands away from the chest and hold them extended.
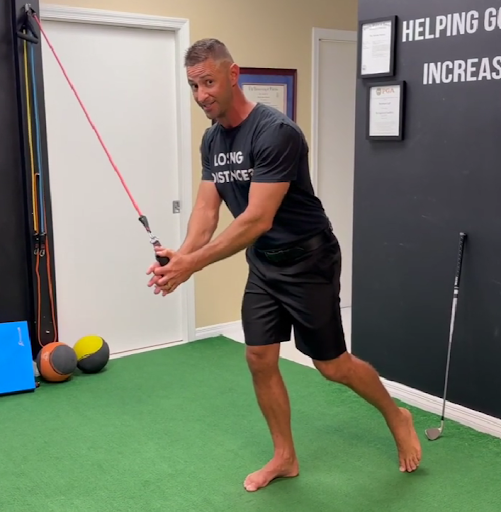
The band creates resistance against the extension. The harder the hands push away, the harder the band pulls back. The core has to work against both the trail leg load and the band resistance simultaneously.
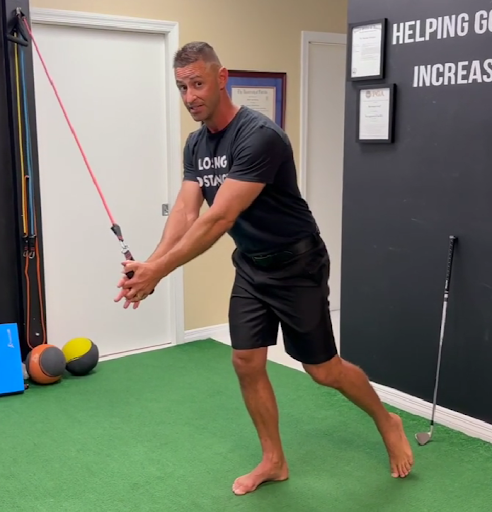
Two minute hold. Same prescription as stage one. If the lead big toe starts bearing more and more weight to compensate, the trail leg is not strong enough yet. Keep working on stage one until the two minute hold is clean before adding the band.
Stage 3, Add the Baby Backswing
Here is where the strength work becomes dynamic and directly golf specific.
From the stage two position, single leg hold with the band extended, add a small backswing. The key word is small. Not a full backswing. A baby backswing where the belt buckle leads and the hands and belt buckle stay directly in front of each other throughout the movement.
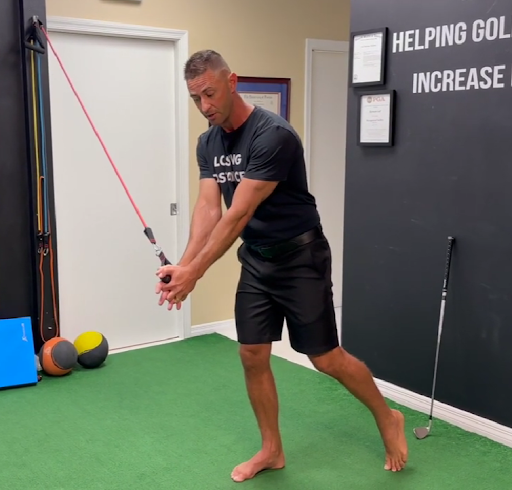
Do not let the hands get behind the belt buckle. If the hands fall behind, the hands initiated instead of the belt buckle, and the whole purpose of the exercise is lost.
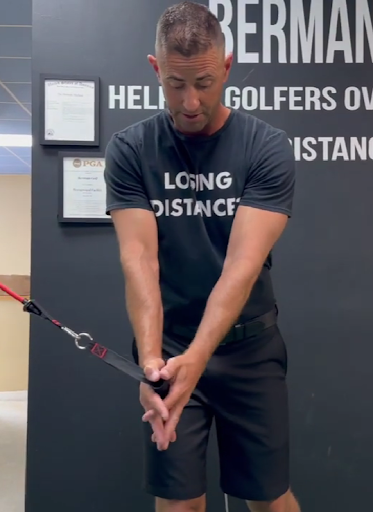
Back to address. Small backswing. Back to address. Small backswing. Two minutes of this dynamic movement while maintaining the single leg balance, the trail glute load, the core engagement, and the band extension.
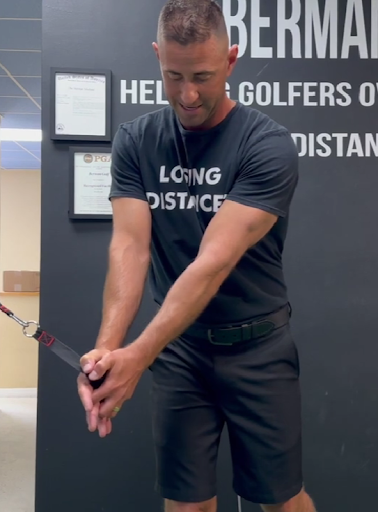
This is where the exercise becomes a genuine workout. The glute is sustaining activation through a dynamic movement pattern instead of a static hold. The core is engaged against the band while the belt buckle leads the rotation. The foot muscles are working hard to maintain stability throughout.
If this does not feel like real physical exertion after a minute, the movement is too big or the body is compensating somewhere.
The Prescription
Here is the exact protocol to follow.
Stage one. Two minute single leg hold barefoot, just the lead big toe barely touching, trail glute on fire, core engaged.
Stage two. Two minute single leg hold with band extended, same base position, hands pushing away against resistance.
Stage three. Two minute dynamic baby backswing from stage two position, belt buckle and hands synchronized, back and forth for the full two minutes.
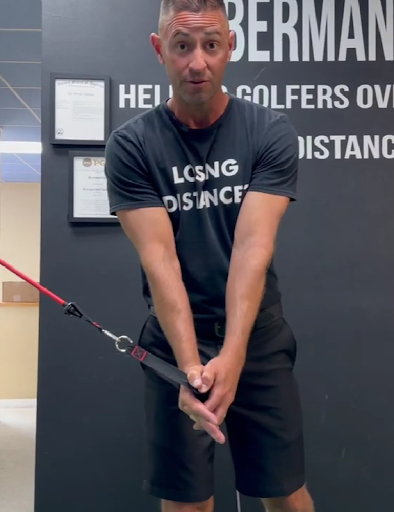
Six total minutes of sustained glute and core work in positions that directly transfer to the golf swing. Do this regularly, not as a one time drill but as an ongoing strengthening practice.
The glute and core endurance built through this progression is what allows all the swing mechanics work being done separately to actually show up under pressure on the course. Technique without the physical capacity to sustain it falls apart on the back nine. This builds the capacity.
Get a Free Swing Analysis
Want to know whether glute and core weakness is limiting distance and ball striking right now?
Set the camera or phone up at two angles. One from the front, face on. One from behind, down the line. Film in slow motion. Swing.
Send both videos to gaindistance.com and Dr. Berman will give a free swing analysis. The first one is on him.
See exactly what the camera shows, not what the brain thinks is happening. The points in the swing where the glutes and core drop out are visible in slow motion and almost always correspond to the moments where contact and consistency break down.
Want a Step-by-Step Blueprint?
If this resonates and the advice out there feels designed for 25-year-old tour pros, there is a simple blueprint built specifically for senior golfers.
It breaks down:
How the aging body changes Which muscles actually produce power How to gain distance without swinging harder How to improve consistency while reducing aches and pains
It is written at a fifth-grade reading level with clear visuals and practical drills that can start immediately.
A FREE digital copy is available at: 👉 gaindistance.com
No gimmicks. Just clarity on how the body should move to play better golf for years to come.
Bringing It All Together
Three stages. Six minutes total. Stage one builds the raw single leg glute endurance needed to load the trail side correctly during the backswing. Stage two adds core engagement against band resistance to build the extension strength that keeps the arc wide. Stage three makes both of those dynamic by adding a small synchronized backswing that trains the belt buckle to lead while the glute and core sustain their activation.
Do it barefoot. Two minutes per stage. If the glute is not burning by the end of each stage, something is being cheated. Find it and fix it.
At Berman Golf, the focus is biomechanics first. Not cookie cutter swings. The goal is teaching the body how it should move, especially as it ages, so power can be generated safely and repeated under pressure.
The in-house and online coaching programs are built specifically for senior golfers who want more distance and better consistency without beating up their bodies.
For anyone tired of advice designed for tour pros and ready for a blueprint built for their body, help is available.
Because when the glutes and core have the strength and endurance to fire through all 18 holes, the swing mechanics built in practice finally show up when it matters most.
And when the muscles show up on the course, the game gets soooooo much easier!
If you enjoyed what you read and want to see it in action, watch the video below where Dr. Berman demonstrates all three stages of the progression!